.NET Core – 创建 UWP 应用
.NET Core – 创建 UWP 应用
在本章中,我们将讨论如何使用 .NET Core 创建 UWP 应用程序。UWP 也称为 Windows 10 UWP 应用程序。此应用程序不能在以前版本的 Windows 上运行,但只能在未来版本的 Windows 上运行。
以下是 UWP 可以顺利运行的一些例外情况。
-
如果你想在本地运行它,你必须有 Windows 10,你也可以在 Windows 8 上开发,然后你需要在模拟器上运行它,但鼓励使用 Windows 10。
-
对于 UWP 应用程序,您还需要 Windows 10 SDK。让我们打开 Visual Studio 2015 安装程序,然后修改 Visual Studio。
-
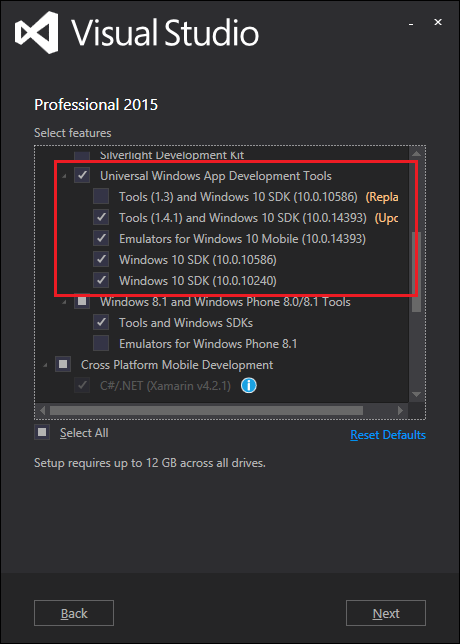
在选择功能页面上,向下滚动,您将看到通用 Windows 应用程序开发工具,如下所示选中该选项。
在这里你可以看到不同版本的 SDK 和最新的 Tools 更新,点击 Next。
现在,单击安装按钮。
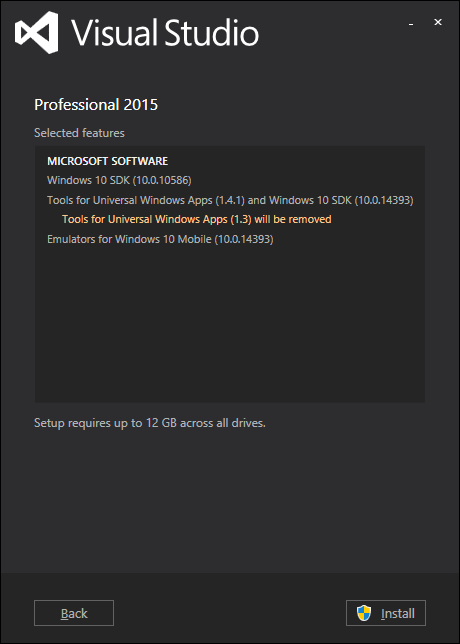
安装完成后,您将需要重新启动系统。

现在让我们按照以下步骤实现 UWP。
-
首先,启动 Visual Studio 2015。
-
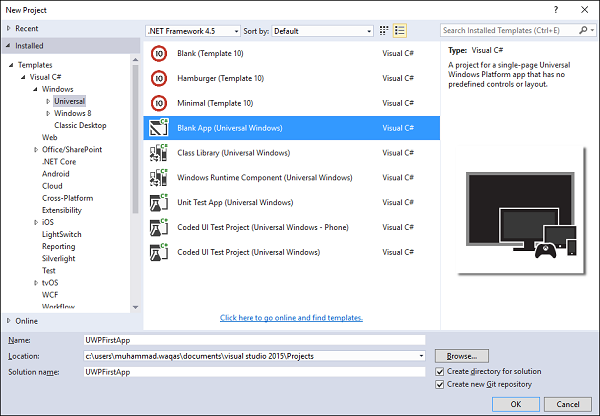
点击文件菜单,选择新建→项目;将出现一个新项目对话框。您可以在对话框的左窗格中看到不同类型的模板。
-
在左窗格中,您可以看到树视图,现在从模板 → Visual C# → Windows 中选择通用模板。
-
从中心窗格中,选择空白应用程序(通用 Windows)模板。
-
通过在名称字段中键入UWPFirstApp为项目命名,然后单击确定。
-
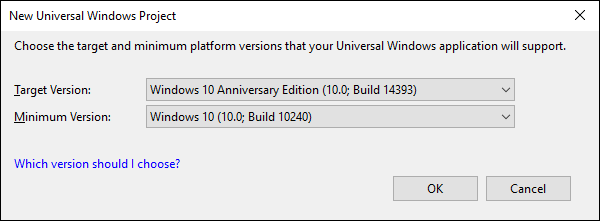
出现目标版本/最低版本对话框。默认设置适用于本教程,因此选择“确定”以创建项目。
-
在这里,我们有一个可以针对所有 Windows 10 设备的项目,您会注意到 .NET Core 和 UWP 都是多目标的简化。
-
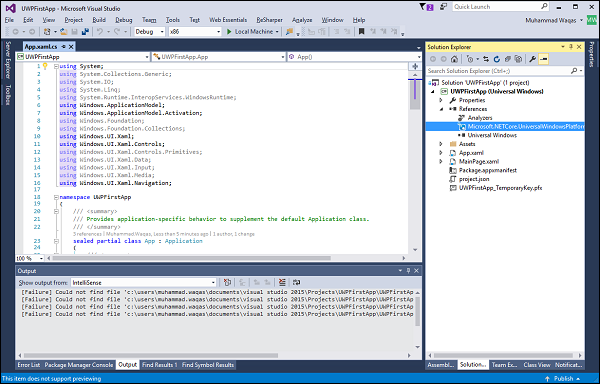
当一个新项目打开时,其文件显示在解决方案资源管理器窗格的右侧。您可能需要选择解决方案资源管理器选项卡而不是属性选项卡来查看您的文件。
-
虽然Blank App(通用窗口)是一个最小的模板,但它仍然包含大量文件。这些文件对于所有使用 C# 的 UWP 应用都是必不可少的。您在 Visual Studio 中创建的每个项目都包含这些文件。
-
要查看正在运行的示例,让我们打开 MainPage.XAML 并添加以下代码。
<Page
   x:Class = "UWPFirstApp.MainPage"
   xmlns = "http://schemas.microsoft.com/winfx/2006/xaml/presentation"
   xmlns:x = "http://schemas.microsoft.com/winfx/2006/xaml"
   xmlns:local = "using:UWPFirstApp"
   xmlns:d = "http://schemas.microsoft.com/expression/blend/2008"
   xmlns:mc = "http://schemas.openxmlformats.org/markup-compatibility/2006"
   mc:Ignorable = "d">

   <Grid Background = "{ThemeResource ApplicationPageBackgroundThemeBrush}">
      <StackPanel HorizontalAlignment = "Center">
         <TextBlock Text = "Hello, world!"
            Margin = "20"
            Width = "200"
            HorizontalAlignment = "Left"/>
         <TextBlock Text = "Write your name."
            Margin = "20"
            Width = "200"
            HorizontalAlignment = "Left"/>
         <TextBox x:Name = "txtbox"
            Width = "280"
            Margin = "20"
            HorizontalAlignment = "Left"/>
         <Button x:Name = "button" Content = "Click Me"
            Margin = "20"
            Click = "button_Click"/>
         <TextBlock x:Name = "txtblock"
            HorizontalAlignment = "Left"
            Margin = "20"/>
      </StackPanel>
   </Grid>

</Page>
下面是C#中按钮的点击事件。
using System;
using System.Collections.Generic;
using System.IO;
using System.Linq;
using System.Runtime.InteropServices.WindowsRuntime;

using Windows.Foundation;
using Windows.Foundation.Collections;

using Windows.UI.Xaml;
using Windows.UI.Xaml.Controls;
using Windows.UI.Xaml.Controls.Primitives;
using Windows.UI.Xaml.Data;
using Windows.UI.Xaml.Input;
using Windows.UI.Xaml.Media;
using Windows.UI.Xaml.Navigation;

// The Blank Page item template is documented at
// http://go.microsoft.com/fwlink/?LinkId=402352&clcid=0x409

namespace UWPHellowWorld {
   /// <summary>
   /// An empty page that can be used on its own or navigated to within a Frame.
   /// </summary>
   public sealed partial class MainPage : Page {
      public MainPage() {
         this.InitializeComponent();
      }
      private void button_Click(object sender, RoutedEventArgs e) {
         if (txtbox.Text != "")
            txtblock.Text = "Hello: " + txtbox.Text;
         else
            txtblock.Text = "You have not write your name";
      }
   }
}
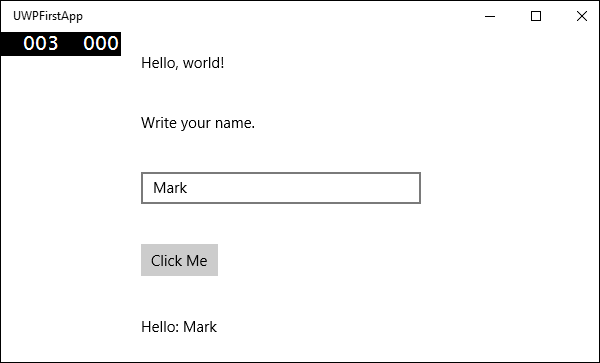
现在让我们在本地机器上运行上述代码,您将看到以下窗口。现在在文本框中键入任何名称,然后按Click Me按钮。