Silverlight – 动画
Silverlight – 动画
动画允许您创建真正动态的用户界面。它通常用于应用效果,例如,当您移过它们时会增长的图标、旋转的徽标、滚动到视图中的文本等。
有时,这些效果似乎过于浮华。如果使用得当,动画可以通过多种方式增强应用程序。它们可以使应用程序看起来更灵敏、更自然、更直观。
例如,当您单击时滑入的按钮感觉就像一个真实的物理按钮,而不仅仅是另一个灰色矩形。动画还可以将注意力吸引到重要元素上,并引导用户过渡到新内容。
Silverlight 的动画方法是声明性的,而不是专注于帧动画序列。
定义动画
动画通常在资源部分中定义。事实上,它们通常被包裹在一个故事板元素中,我们稍后会详细介绍。
-
它提供了一个 Begin() 方法,因此可以从代码中调用动画。
-
动画也可以放在控件模板中的视觉状态元素内。
声明式动画
Silverlight 中的动画是声明性的。他们描述了希望发生的事情。由 Silverlight 来解决如何实现这一目标。所以动画通常遵循我们告诉 Silverlight 我们想要改变的模式。
这始终是某些命名元素的某些属性,即TargetName和TargetProperty。
<DoubleAnimation
   Storyboard.TargetName = "myRectangle"
   Storyboard.TargetProperty = "Opacity"
   From = "0" To = "1"
   Duration = "0:0:5"
/>
-
我们说我们希望该属性如何改变,在这种情况下,我们将不透明度从零值更改为值 1。换句话说,我们喜欢目标元素从不透明渐变为透明。
-
最后,我们说我们希望这需要多长时间,在这种情况下需要五秒钟。
-
double 在这个 double 动画中的意义在于它的目标是一个 double 类型的属性,因此是一个浮点值。
-
如果要为表示颜色的属性设置动画,请改用颜色动画。
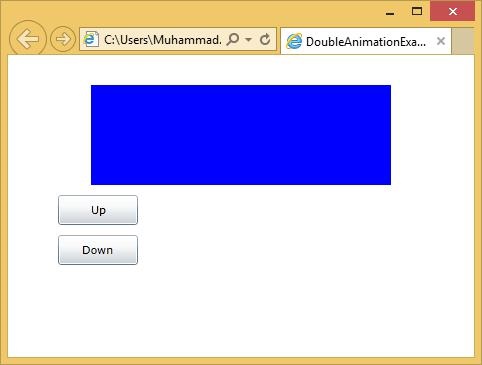
让我们看一个简单的双动画示例。下面给出的是 XAML 代码,其中添加了两个按钮、一个矩形和两个故事板。
<UserControl x:Class = "DoubleAnimationExample.MainPage"
   xmlns = "http://schemas.microsoft.com/winfx/2006/xaml/presentation"
   xmlns:x = "http://schemas.microsoft.com/winfx/2006/xaml"
   xmlns:d = "http://schemas.microsoft.com/expression/blend/2008"
   xmlns:mc = "http://schemas.openxmlformats.org/markup-compatibility/2006"
   mc:Ignorable = "d" d:DesignWidth = "640" d:DesignHeight = "480">

   <UserControl.Resources>

      <Storyboard x:Name = "fadeDown">
         <DoubleAnimation
            Storyboard.TargetName = "myRectangle"
            Storyboard.TargetProperty = "Opacity"
            From = "1" To = "0"
            Duration = "0:0:5" />
      </Storyboard>

      <Storyboard x:Name = "fadeUp">
         <DoubleAnimation
            Storyboard.TargetName = "myRectangle"
            Storyboard.TargetProperty = "Opacity"
            From = "0" To = "1"
            Duration = "0:0:5" />
      </Storyboard>

   </UserControl.Resources>

   <Grid x:Name = "LayoutRoot">
      <Rectangle x:Name = "myRectangle"
         Fill = "Blue" Width = "300" Height = "100"
         HorizontalAlignment = "Center"
         VerticalAlignment = "Top" Margin = "0,30" />

      <Button x:Name = "fadeUpButton" Content = "Up" Width = "80"
         Height = "30" HorizontalAlignment = "Left"
         VerticalAlignment = "Top" Margin = "50,140,0,0"
         Click = "fadeUpButton_Click" />

      <Button x:Name = "fadeDownButton" Content = "Down"
         Width = "80" Height = "30" HorizontalAlignment = "Left"
         VerticalAlignment = "Top" Margin = "50,180,0,0"
         Click = "fadeDownButton_Click" />

   </Grid>

</UserControl>
这是 C# 中不同事件的实现。
using System.Windows;
using System.Windows.Controls;

namespace DoubleAnimationExample {

   public partial class MainPage : UserControl {

      public MainPage() {
         InitializeComponent();
      }

      private void fadeUpButton_Click(object sender, RoutedEventArgs e) {
         fadeUp.Begin();
      }

      private void fadeDownButton_Click(object sender, RoutedEventArgs e) {
         fadeDown.Begin();
      }
   }
}
当上面的代码编译执行后,你会看到下面的输出。
重复和反转
动画提供了一些属性来自动重复和所有反向动画。
-
如果您将重复行为属性设置为时间垃圾邮件,动画将循环重复,直到指定的时间段过去,或者您可以告诉它您希望它重复多少次。
-
这支持小数点,因此您可以重复四次半。
-
您可以永远重复,也可以告诉动画一旦到达终点,它应该反向运行回到起点。
关键帧动画
通常从 A 到 B 的简单动画有点太简单了。例如,您想要制作一个从地面弹起的球的动画。这不是简单的点对点移动。球落下,逐渐加速,然后在击中底部时改变方向。当它回到其行程的顶部时再次放慢速度。
让我们看一个关键帧动画的简单例子。
下面给出的是 XAML 代码,其中包含一个椭圆和带关键帧的双动画。
<UserControl x:Class = "LinearKeyFrames.MainPage"
   xmlns = "http://schemas.microsoft.com/winfx/2006/xaml/presentation"
   xmlns:x = "http://schemas.microsoft.com/winfx/2006/xaml"
   xmlns:d = "http://schemas.microsoft.com/expression/blend/2008"
   xmlns:mc = "http://schemas.openxmlformats.org/markup-compatibility/2006"
   mc:Ignorable = "d"
   Width = "400" Height = "300">

   <UserControl.Resources>

      <Storyboard x:Name = "ballAnim" SpeedRatio = "0.2">
         <DoubleAnimation From = "0" Duration = "00:00:03" To = "96"
            Storyboard.TargetName = "ellipse"
            Storyboard.TargetProperty = "(Canvas.Left)" />

         <DoubleAnimationUsingKeyFrames
            Storyboard.TargetName = "ellipse"
            Storyboard.TargetProperty = "(Canvas.Top)">

            <LinearDoubleKeyFrame KeyTime = "00:00:00"   Value = "0"/>
            <LinearDoubleKeyFrame KeyTime = "00:00:00.5" Value = "16" />
            <LinearDoubleKeyFrame KeyTime = "00:00:01"   Value = "48"/>
            <LinearDoubleKeyFrame KeyTime = "00:00:01.5" Value = "112"/>
            <LinearDoubleKeyFrame KeyTime = "00:00:02"   Value = "48"/>
            <LinearDoubleKeyFrame KeyTime = "00:00:02.5" Value = "16"/>
            <LinearDoubleKeyFrame KeyTime = "00:00:03"   Value = "0"/>

         </DoubleAnimationUsingKeyFrames>

      </Storyboard>

   </UserControl.Resources>

   <Grid x:Name = "LayoutRoot" Background = "White">
      <Canvas>
         <Ellipse x:Name = "ellipse" Fill = "Aqua" Width = "50" Height = "50" />
      </Canvas>
   </Grid>

</UserControl>
这是鼠标左键按下事件的实现,当用户在网页上按下鼠标左键时,该事件将开始动画。
using System.Windows.Controls;
using System.Windows.Input;

namespace LinearKeyFrames {

   public partial class MainPage : UserControl {

      public MainPage() {
         InitializeComponent();
         this.MouseLeftButtonDown += new MouseButtonEventHandler(Page_MouseLeftButtonDown);
      }

      void Page_MouseLeftButtonDown(object sender, MouseButtonEventArgs e) {
         ballAnim.Begin();
      }
   }
}
当上面的代码编译执行后,你会看到下面的输出。
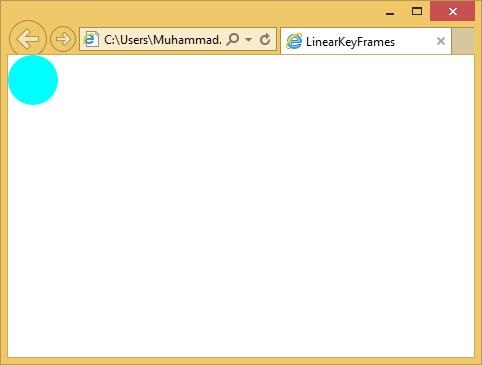
当您单击网页时,您将看到球开始移动。

