MVVM – WPF 数据模板
MVVM – WPF 数据模板
模板描述了控件的整体外观和视觉外观。对于每个控件,都有一个与之关联的默认模板,该模板为该控件提供外观。在 WPF 应用程序中,当您想要自定义控件的视觉行为和视觉外观时,您可以轻松创建自己的模板。逻辑和模板之间的连接可以通过数据绑定来实现。
在 MVVM 中,还有另一种主要形式,称为 ViewModel 优先构造。
-
ViewModel 第一种构造方法利用了 WPF 中隐式数据模板的功能。
-
隐式数据模板可以自动从当前资源字典中为使用数据绑定的元素选择合适的模板。他们根据数据绑定呈现的数据对象的类型来执行此操作。首先,您需要有一些绑定到数据对象的元素。
让我们再次看一下我们的简单示例,在该示例中您将了解如何首先利用数据模板(特别是隐式数据模板)进行视图模型。这是我们的 StudentViewModel 类的实现。
using MVVMDemo.Model;
using System.Collections.ObjectModel;

namespace MVVMDemo.ViewModel {

   public class StudentViewModel {

      public StudentViewModel() {
         LoadStudents();
      }

      public ObservableCollection<Student> Students {
         get;
         set;
      }

      public void LoadStudents() {
         ObservableCollection<Student> students = new ObservableCollection<Student>();

         students.Add(new Student { FirstName = "Mark", LastName = "Allain" });
         students.Add(new Student { FirstName = "Allen", LastName = "Brown" });
         students.Add(new Student { FirstName = "Linda", LastName = "Hamerski" });

         Students = students;
      }
   }
}
可以看到上面的ViewModel没有变化。我们将继续使用上一章中的相同示例。这个 ViewModel 类只公开学生集合属性并在构造时填充它。让我们转到 StudentView.xaml 文件,删除现有的实现并在参考资料部分定义一个数据模板。
<UserControl.Resources>
   <DataTemplate x:Key = "studentsTemplate">

      <StackPanel Orientation = "Horizontal">
         <TextBox Text = "{Binding Path = FirstName, Mode = TwoWay}"
            Width = "100" Margin = "3 5 3 5"/>

         <TextBox Text = "{Binding Path = LastName, Mode = TwoWay}"
            Width = "100" Margin = "0 5 3 5"/>

         <TextBlock Text = "{Binding Path = FullName, Mode = OneWay}"
            Margin = "0 5 3 5"/>
      </StackPanel>

   </DataTemplate>
</UserControl.Resources>
现在添加一个列表框并将该列表框数据绑定到 Students 属性,如以下代码所示。
<ListBox ItemsSource = "{Binding Students}" ItemTemplate = "{StaticResource studentsTemplate}"/>
在 Resource 部分,DataTemplate 有一个 studentTemplate 键,然后要实际使用该模板,我们需要使用 ListBox 的 ItemTemplate 属性。所以现在您可以看到我们指示列表框使用该特定模板来渲染这些学生。以下是 StudentView.xaml 文件的完整实现。
<UserControl x:Class = "MVVMDemo.Views.StudentView"
   xmlns = "http://schemas.microsoft.com/winfx/2006/xaml/presentation"
   xmlns:x = "http://schemas.microsoft.com/winfx/2006/xaml"
   xmlns:mc = "http://schemas.openxmlformats.org/markup-compatibility/2006"
   xmlns:d = "http://schemas.microsoft.com/expression/blend/2008"
   xmlns:local = "clr-namespace:MVVMDemo.Views"
   xmlns:viewModel = "clr-namespace:MVVMDemo.ViewModel"
   xmlns:vml = "clr-namespace:MVVMDemo.VML"
   vml:ViewModelLocator.AutoHookedUpViewModel = "True"
   mc:Ignorable = "d" d:DesignHeight = "300" d:DesignWidth = "300">

   <UserControl.Resources>
      <DataTemplate x:Key = "studentsTemplate">

         <StackPanel Orientation = "Horizontal">
            <TextBox Text = "{Binding Path = FirstName, Mode = TwoWay}"
               Width = "100" Margin = "3 5 3 5"/>

            <TextBox Text = "{Binding Path = LastName, Mode = TwoWay}"
               Width = "100" Margin = "0 5 3 5"/>

            <TextBlock Text = "{Binding Path = FullName, Mode = OneWay}"
               Margin = "0 5 3 5"/>

         </StackPanel>

      </DataTemplate>
   </UserControl.Resources>

   <Grid>
      <ListBox
         ItemsSource = "{Binding Students}"
         ItemTemplate = "{StaticResource studentsTemplate}"/>
   </Grid>

</UserControl>
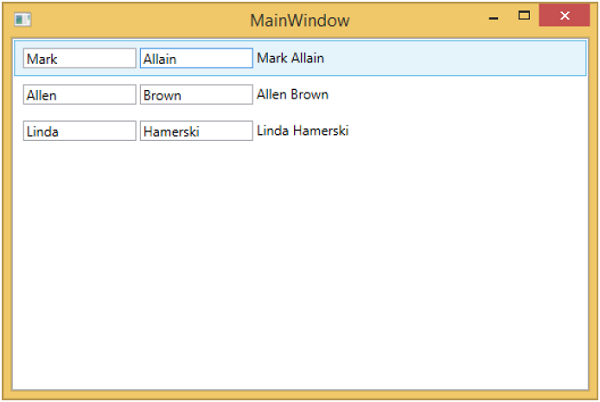
上述代码编译执行后,会看到如下窗口,其中包含一个ListBox。每个 ListBoxItem 包含显示在 TextBlock 和文本框上的 Student 类对象数据。
要使其成为隐式模板,我们需要从列表框中删除 ItemTemplate 属性并在我们的模板定义中添加一个 DataType 属性,如以下代码所示。
<UserControl.Resources>
   <DataTemplate DataType = "{x:Type data:Student}">

      <StackPanel Orientation = "Horizontal">
         <TextBox Text = "{Binding Path = FirstName, Mode = TwoWay}"
            Width = "100" Margin = "3 5 3 5"/>

         <TextBox Text = "{Binding Path = LastName, Mode = TwoWay}"
            Width = "100" Margin = "0 5 3 5"/>

         <TextBlock Text = "{Binding Path = FullName, Mode = OneWay}"
            Margin = "0 5 3 5"/>

      </StackPanel>

   </DataTemplate>
</UserControl.Resources>

<Grid>
   <ListBox ItemsSource = "{Binding Students}"/>
</Grid>
在 DataTemplate 中,x:Type 标记扩展非常重要,它就像 XAML 中的一种运算符。所以,基本上我们需要指向 MVVMDemo.Model 命名空间中的 Student 数据类型。以下是更新后的完整 XAML 文件。
<UserControl x:Class="MVVMDemo.Views.StudentView"
   xmlns = "http://schemas.microsoft.com/winfx/2006/xaml/presentation"
   xmlns:x = "http://schemas.microsoft.com/winfx/2006/xaml"
   xmlns:mc = "http://schemas.openxmlformats.org/markup-compatibility/2006"
   xmlns:d = "http://schemas.microsoft.com/expression/blend/2008"
   xmlns:local = "clr-namespace:MVVMDemo.Views"
   xmlns:viewModel = "clr-namespace:MVVMDemo.ViewModel"
   xmlns:data = "clr-namespace:MVVMDemo.Model"
   xmlns:vml = "clr-namespace:MVVMDemo.VML"
   vml:ViewModelLocator.AutoHookedUpViewModel = "True"
   mc:Ignorable = "d" d:DesignHeight = "300" d:DesignWidth = "300">

   <UserControl.Resources>
      <DataTemplate DataType = "{x:Type data:Student}">

         <StackPanel Orientation = "Horizontal">
            <TextBox Text = "{Binding Path = FirstName, Mode = TwoWay}"
               Width = "100" Margin = "3 5 3 5"/>

            <TextBox Text = "{Binding Path = LastName, Mode = TwoWay}"
               Width = "100" Margin = "0 5 3 5"/>

            <TextBlock Text = "{Binding Path = FullName, Mode = OneWay}"
               Margin = "0 5 3 5"/>

         </StackPanel>

      </DataTemplate>
   </UserControl.Resources>

   <Grid>
      <ListBox ItemsSource = "{Binding Students}"/>
   </Grid>

</UserControl>
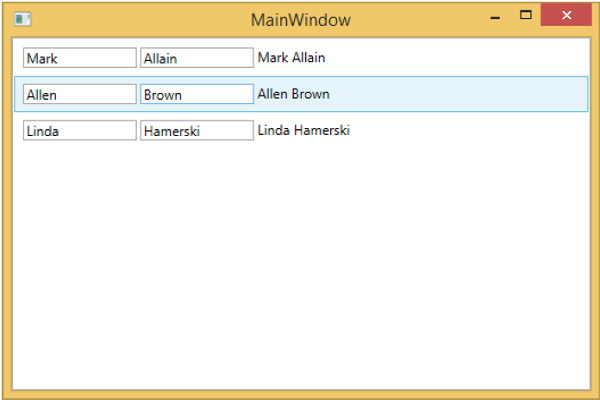
当您再次运行此应用程序时,您仍将获得具有数据模板的学生的相同呈现,因为它通过定位适当的 DataTemplate 自动映射正在呈现的对象的类型。
我们建议您以循序渐进的方式执行上述示例,以便更好地理解。
