MVVM – 验证
MVVM – 验证
在本章中,我们将了解验证。我们还将研究一种使用 WPF 绑定已经支持但将其绑定到 MVVM 组件的简洁方法进行验证。
MVVM 中的验证
-
当您的应用程序开始接受来自最终用户的数据输入时,您需要考虑验证该输入。
-
确保它符合您的总体要求。
-
WPF 在绑定系统中具有一些用于验证输入的出色构建和功能,您在执行 MVVM 时仍然可以利用所有这些功能。
-
请记住,支持您的验证并定义哪些属性存在哪些规则的逻辑应该是 Model 或 ViewModel 的一部分,而不是 View 本身。
您仍然可以使用 WPF 数据绑定支持的所有表达验证方式,包括 –
- 设置在属性上抛出异常。
- 实现 IDataErrorInfo 接口。
- 实现 INotifyDataErrorInfo。
- 使用 WPF 验证规则。
通常,推荐使用 INotifyDataErrorInfo 并将其引入 WPF .net 4.5,它支持查询对象以查找与属性相关的错误,它还修复了所有其他选项的一些缺陷。具体来说,它允许异步验证。它允许属性有多个与之相关的错误。
添加验证
让我们看一个示例,在该示例中,我们将向输入视图添加验证支持,在大型应用程序中,您可能需要在应用程序中的许多地方使用它。有时在 Views 上,有时在 ViewModels 上,有时在这些辅助对象上有围绕模型对象的包装器。
将验证支持放在一个公共基类中是一个很好的做法,然后您可以从不同的场景中继承该基类。
基类将支持 INotifyDataErrorInfo,以便在属性更改时触发验证。
创建添加一个名为 ValidatableBindableBase 的新类。由于我们已经有一个用于处理属性更改的基类,让我们从中派生出基类并实现 INotifyDataErrorInfo 接口。
以下是 ValidatableBindableBase 类的实现。
using System;
using System.Collections.Generic;
using System.ComponentModel;

//using System.ComponentModel.DataAnnotations;
using System.Linq;
using System.Runtime.CompilerServices;
using System.Text;
using System.Threading.Tasks;
using System.Windows.Controls;

namespace MVVMHierarchiesDemo {

   public class ValidatableBindableBase : BindableBase, INotifyDataErrorInfo {
      private Dictionary<string, List<string>> _errors = new Dictionary<string, List<string>>();

      public event EventHandler<DataErrorsChangedEventArgs>
         ErrorsChanged = delegate { };

      public System.Collections.IEnumerable GetErrors(string propertyName) {

         if (_errors.ContainsKey(propertyName))
            return _errors[propertyName];
         else
            return null;
      }

      public bool HasErrors {
         get { return _errors.Count > 0; }
      }

      protected override void SetProperty<T>(ref T member, T val,
         [CallerMemberName] string propertyName = null) {

         base.SetProperty<T>(ref member, val, propertyName);
         ValidateProperty(propertyName, val);
      }

      private void ValidateProperty<T>(string propertyName, T value) {
         var results = new List<ValidationResult>();

         //ValidationContext context = new ValidationContext(this);
         //context.MemberName = propertyName;
         //Validator.TryValidateProperty(value, context, results);

         if (results.Any()) {
            //_errors[propertyName] = results.Select(c => c.ErrorMessage).ToList();
         } else {
            _errors.Remove(propertyName);
         }

         ErrorsChanged(this, new DataErrorsChangedEventArgs(propertyName));
      }
   }
}
现在在各自的文件夹中添加 AddEditCustomerView 和 AddEditCustomerViewModel 。以下是 AddEditCustomerView.xaml 的代码。
<UserControl x:Class = "MVVMHierarchiesDemo.Views.AddEditCustomerView"
   xmlns = "http://schemas.microsoft.com/winfx/2006/xaml/presentation"
   xmlns:x = "http://schemas.microsoft.com/winfx/2006/xaml"
   xmlns:mc = "http://schemas.openxmlformats.org/markup-compatibility/2006"
   xmlns:d = "http://schemas.microsoft.com/expression/blend/2008"
   xmlns:local = "clr-namespace:MVVMHierarchiesDemo.Views"
   mc:Ignorable = "d"
   d:DesignHeight = "300" d:DesignWidth = "300">

   <Grid>
      <Grid.RowDefinitions>
         <RowDefinition Height = "Auto" />
         <RowDefinition Height = "Auto" />
      </Grid.RowDefinitions>

      <Grid x:Name = "grid1"
         HorizontalAlignment = "Left"
         DataContext = "{Binding Customer}"
         Margin = "10,10,0,0"
         VerticalAlignment = "Top">

         <Grid.ColumnDefinitions>
            <ColumnDefinition Width = "Auto" />
            <ColumnDefinition Width = "Auto" />
         </Grid.ColumnDefinitions>

         <Grid.RowDefinitions>
            <RowDefinition Height = "Auto" />
            <RowDefinition Height = "Auto" />
            <RowDefinition Height = "Auto" />
            <RowDefinition Height = "Auto" />
         </Grid.RowDefinitions>

         <Label Content = "First Name:"
            Grid.Column = "0"
            HorizontalAlignment = "Left"
            Margin = "3"
            Grid.Row = "0"
            VerticalAlignment = "Center" />

         <TextBox x:Name = "firstNameTextBox"
            Grid.Column = "1"
            HorizontalAlignment = "Left"
            Height = "23"
            Margin = "3"
            Grid.Row = "0"
            Text = "{Binding FirstName, ValidatesOnNotifyDataErrors = True}"
            VerticalAlignment = "Center"
            Width = "120" />

         <Label Content = "Last Name:"
            Grid.Column = "0"
            HorizontalAlignment = "Left"
            Margin = "3"
            Grid.Row = "1"
            VerticalAlignment = "Center" />

         <TextBox x:Name = "lastNameTextBox"
            Grid.Column = "1"
            HorizontalAlignment = "Left"
            Height = "23"
            Margin = "3"
            Grid.Row = "1"
            Text = "{Binding LastName, ValidatesOnNotifyDataErrors = True}"
            VerticalAlignment = "Center"
            Width = "120" />

         <Label Content = "Email:"
            Grid.Column = "0"
            HorizontalAlignment = "Left"
            Margin = "3"
            Grid.Row = "2"
            VerticalAlignment = "Center" />

         <TextBox x:Name = "emailTextBox"
            Grid.Column = "1"
            HorizontalAlignment = "Left"
            Height = "23"
            Margin = "3"
            Grid.Row = "2"
            Text = "{Binding Email, ValidatesOnNotifyDataErrors = True}"
            VerticalAlignment = "Center"
            Width = "120" />

         <Label Content = "Phone:"
            Grid.Column = "0"
            HorizontalAlignment = "Left"
            Margin = "3"
            Grid.Row = "3"
            VerticalAlignment = "Center" />

         <TextBox x:Name = "phoneTextBox"
            Grid.Column = "1"
            HorizontalAlignment = "Left"
            Height = "23"
            Margin = "3"
            Grid.Row = "3"
            Text = "{Binding Phone, ValidatesOnNotifyDataErrors = True}"
            VerticalAlignment = "Center"
            Width = "120" />

      </Grid>

      <Grid Grid.Row = "1">
         <Button Content = "Save"
            Command = "{Binding SaveCommand}"
            HorizontalAlignment = "Left"
            Margin = "25,5,0,0"
            VerticalAlignment = "Top"
            Width = "75" />

         <Button Content = "Add"
            Command = "{Binding SaveCommand}"
            HorizontalAlignment = "Left"
            Margin = "25,5,0,0"
            VerticalAlignment = "Top"
            Width = "75" />

         <Button Content = "Cancel"
            Command = "{Binding CancelCommand}"
            HorizontalAlignment = "Left"
            Margin = "150,5,0,0"
            VerticalAlignment = "Top"
            Width = "75" />
      </Grid>

   </Grid>

</UserControl>
以下是 AddEditCustomerViewModel 实现。
using MVVMHierarchiesDemo.Model;

using System;
using System.Collections.Generic;
using System.Linq;
using System.Text;
using System.Threading.Tasks;

namespace MVVMHierarchiesDemo.ViewModel {

   class AddEditCustomerViewModel : BindableBase {

      public AddEditCustomerViewModel() {
         CancelCommand = new MyIcommand(OnCancel);
         SaveCommand = new MyIcommand(OnSave, CanSave);
      }

      private bool _EditMode;

      public bool EditMode {
         get { return _EditMode; }
         set { SetProperty(ref _EditMode, value);}
      }

      private SimpleEditableCustomer _Customer;

      public SimpleEditableCustomer Customer {
         get { return _Customer; }
         set { SetProperty(ref _Customer, value);}
      }

      private Customer _editingCustomer = null;

      public void SetCustomer(Customer cust) {
         _editingCustomer = cust;

         if (Customer != null) Customer.ErrorsChanged -= RaiseCanExecuteChanged;
         Customer = new SimpleEditableCustomer();
         Customer.ErrorsChanged += RaiseCanExecuteChanged;
         CopyCustomer(cust, Customer);
      }

      private void RaiseCanExecuteChanged(object sender, EventArgs e) {
         SaveCommand.RaiseCanExecuteChanged();
      }

      public MyIcommand CancelCommand { get; private set; }
      public MyIcommand SaveCommand { get; private set; }

      public event Action Done = delegate { };

      private void OnCancel() {
         Done();
      }

      private async void OnSave() {
         Done();
      }

      private bool CanSave() {
         return !Customer.HasErrors;
      }
   }
}
以下是 SimpleEditableCustomer 类的实现。
using System;
using System.Collections.Generic;
using System.Linq;
using System.Text;
using System.Threading.Tasks;

namespace MVVMHierarchiesDemo.Model {

   public class SimpleEditableCustomer : ValidatableBindableBase {
      private Guid _id;

      public Guid Id {
         get { return _id; }
         set { SetProperty(ref _id, value); }
      }

      private string _firstName;
      [Required]

      public string FirstName {
         get { return _firstName; }
         set { SetProperty(ref _firstName, value); }
      }

      private string _lastName;
      [Required]

      public string LastName {
         get { return _lastName; }
         set { SetProperty(ref _lastName, value); }
      }

      private string _email;
      [EmailAddress]

      public string Email {
         get { return _email; }
         set { SetProperty(ref _email, value); }
      }

      private string _phone;
      [Phone]

      public string Phone {
         get { return _phone; }
         set { SetProperty(ref _phone, value); }
      }
   }
}
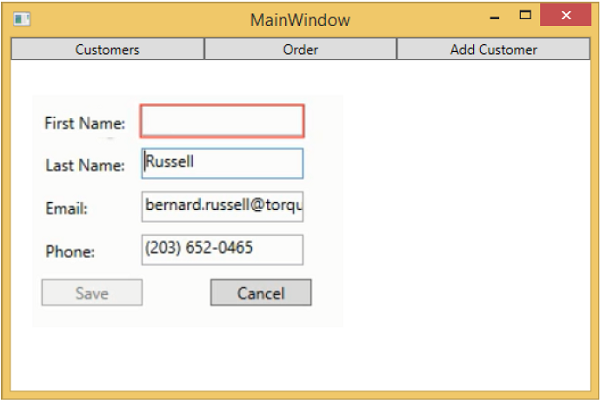
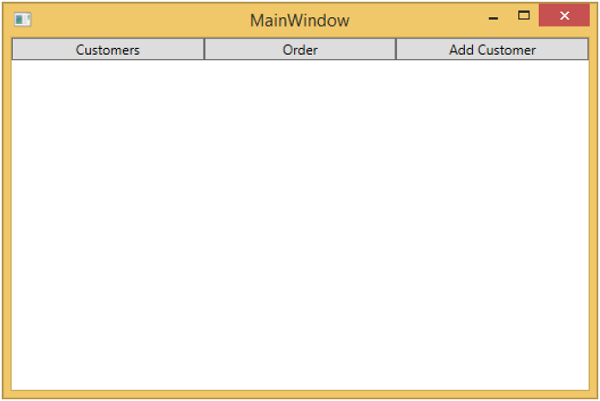
上述代码编译执行后,会看到如下窗口。
当您按下添加客户按钮时,您将看到以下视图。当用户将任何字段留空时,它将突出显示并且保存按钮将被禁用。