MVVM – 层次结构和导航
MVVM – 层次结构和导航
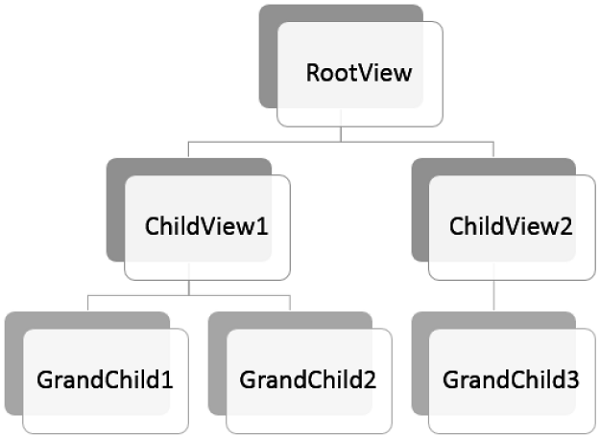
在构建 MVVM 应用程序时,您通常将复杂的信息屏幕分解为一组父视图和子视图,其中子视图包含在面板或容器控件中的父视图中,并形成使用层次结构本身。
-
分解复杂的视图后,这并不意味着您分离到其自己的 XAML 文件中的每个子内容都必须是 MVVM 视图。
-
内容块仅提供将某些内容呈现到屏幕上的结构,不支持用户对该内容的任何输入或操作。
-
它可能不需要单独的 ViewModel,但它可能只是一个基于父 ViewModel 公开的属性呈现的块 XAML。
-
最后,如果您有视图和视图模型的层次结构,父视图模型可以成为通信的中心,这样每个子视图模型可以尽可能地与其他子视图模型及其父视图保持解耦。
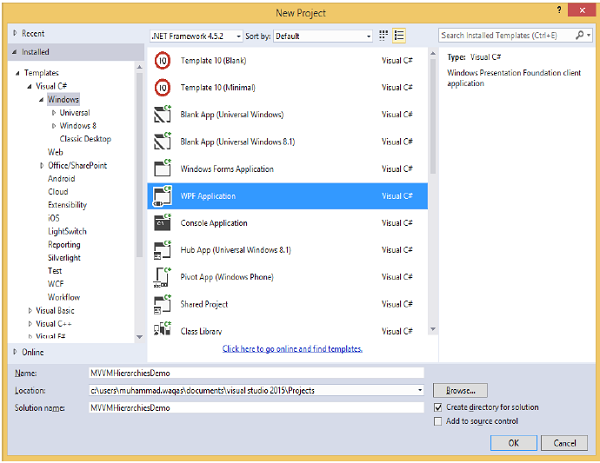
让我们看一个例子,在这个例子中,我们将在不同的视图之间定义一个简单的层次结构。创建一个新的 WPF 应用程序项目MVVMHierarchiesDemo
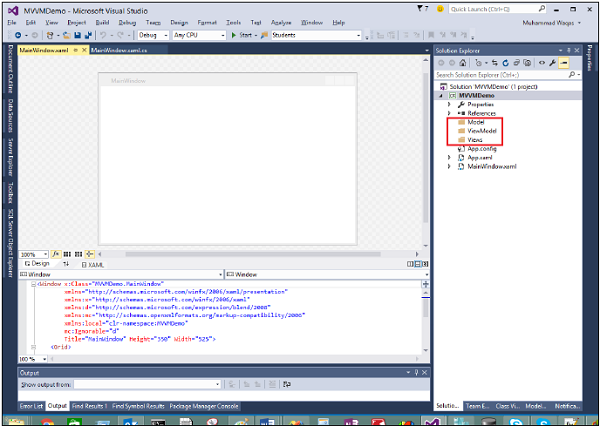
步骤 1 – 将三个文件夹(模型、视图模型和视图)添加到您的项目中。
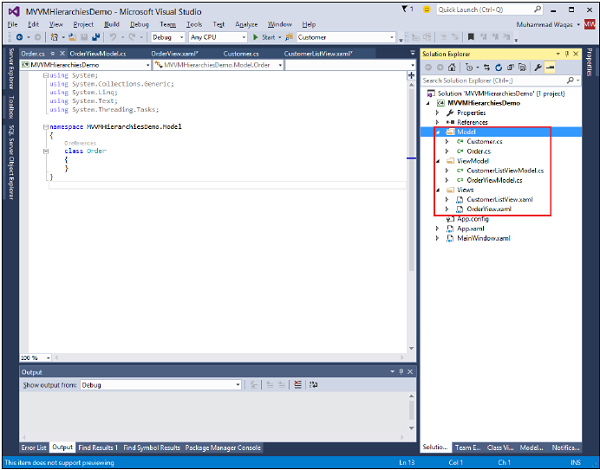
步骤 2 – 在 Model 文件夹中添加 Customer 和 Order 类,在 Views 文件夹中添加 CustomerListView 和 OrderView,在 ViewModel 文件夹中添加 CustomerListViewModel 和 OrderViewModel,如下图所示。
第 3 步– 在 CustomerListView 和 OrderView 中添加文本块。这是 CustomerListView.xaml 文件。
<UserControl x:Class="MVVMHierarchiesDemo.Views.CustomerListView"
   xmlns = "http://schemas.microsoft.com/winfx/2006/xaml/presentation"
   xmlns:x = "http://schemas.microsoft.com/winfx/2006/xaml"
   xmlns:mc = "http://schemas.openxmlformats.org/markup-compatibility/2006"
   xmlns:d = "http://schemas.microsoft.com/expression/blend/2008"
   xmlns:local = "clr-namespace:MVVMHierarchiesDemo.Views"
   mc:Ignorable = "d"
   d:DesignHeight = "300" d:DesignWidth = "300">

   <Grid>
      <TextBlock Text = "Customer List View"/>
   </Grid>

</UserControl>
以下是 OrderView.xaml 文件。
<UserControl x:Class = "MVVMHierarchiesDemo.Views.OrderView"
   xmlns = "http://schemas.microsoft.com/winfx/2006/xaml/presentation"
   xmlns:x ="http://schemas.microsoft.com/winfx/2006/xaml"
   xmlns:mc ="http://schemas.openxmlformats.org/markup-compatibility/2006"
   xmlns:d ="http://schemas.microsoft.com/expression/blend/2008"
   xmlns:local = "clr-namespace:MVVMHierarchiesDemo.Views" mc:Ignorable = "d"
   d:DesignHeight = "300" d:DesignWidth = "300">

   <Grid>
      <TextBlock Text = "Order View"/>
   </Grid>

</UserControl>
现在我们需要一些东西来承载这些视图,并且在我们的 MainWindow 中有一个很好的地方,因为它是一个简单的应用程序。我们需要一个容器控件,我们可以放置我们的视图并以导航方式切换它们。为此,我们需要在 MainWindow.xaml 文件中添加 ContentControl,我们将使用其内容属性并将其绑定到 ViewModel 引用。
现在为资源字典中的每个视图定义数据模板。以下是 MainWindow.xaml 文件。请注意每个数据模板如何将数据类型(ViewModel 类型)映射到相应的视图。
<Window x:Class = "MVVMHierarchiesDemo.MainWindow"
   xmlns = "http://schemas.microsoft.com/winfx/2006/xaml/presentation"
   xmlns:x = "http://schemas.microsoft.com/winfx/2006/xaml"
   xmlns:d = "http://schemas.microsoft.com/expression/blend/2008"
   xmlns:mc = "http://schemas.openxmlformats.org/markup-compatibility/2006"
   xmlns:local = "clr-namespace:MVVMHierarchiesDemo"
   xmlns:views = "clr-namespace:MVVMHierarchiesDemo.Views"
   xmlns:viewModels = "clr-namespace:MVVMHierarchiesDemo.ViewModel"
   mc:Ignorable = "d"
   Title = "MainWindow" Height = "350" Width = "525">

   <Window.DataContext>
      <local:MainWindowViewModel/>
   </Window.DataContext>

   <Window.Resources>
      <DataTemplate DataType = "{x:Type viewModels:CustomerListViewModel}">
         <views:CustomerListView/>
      </DataTemplate>

      <DataTemplate DataType = "{x:Type viewModels:OrderViewModel}">
         <views:OrderView/>
      </DataTemplate>
   </Window.Resources>

   <Grid>
      <ContentControl Content = "{Binding CurrentView}"/>
   </Grid>

</Window>
任何时候将当前视图模型设置为 CustomerListViewModel 的实例,它都会渲染出一个 CustomerListView 并连接了 ViewModel。它是一个订单 ViewModel,它会渲染出 OrderView 等等。
我们现在需要一个具有 CurrentViewModel 属性的 ViewModel 和一些逻辑和命令,以便能够在属性内切换 ViewModel 的当前引用。
让我们为这个 MainWindow 创建一个名为 MainWindowViewModel 的 ViewModel。我们可以从 XAML 创建我们的 ViewModel 的一个实例,并使用它来设置窗口的 DataContext 属性。为此,我们需要创建一个基类来封装 ViewModel 的 INotifyPropertyChanged 实现。
该类背后的主要思想是封装 INotifyPropertyChanged 实现并向派生类提供辅助方法,以便它们可以轻松触发适当的通知。以下是 BindableBase 类的实现。
using System;
using System.Collections.Generic;
using System.ComponentModel;
using System.Linq;
using System.Runtime.CompilerServices;
using System.Text;
using System.Threading.Tasks;

namespace MVVMHierarchiesDemo {

   class BindableBase : INotifyPropertyChanged {

      protected virtual void SetProperty<T>(ref T member, T val,
         [CallerMemberName] string propertyName = null) {
            if (object.Equals(member, val)) return;

            member = val;
            PropertyChanged(this, new PropertyChangedEventArgs(propertyName));
      }

      protected virtual void OnPropertyChanged(string propertyName) {
         PropertyChanged(this, new PropertyChangedEventArgs(propertyName));
      }

      public event PropertyChangedEventHandler PropertyChanged = delegate { };
   }
}
现在是时候开始使用我们的 CurrentViewModel 属性进行一些视图切换了。我们只需要某种方式来驱动此属性的设置。我们将使其最终用户可以命令进入客户列表或订单视图。首先在您的项目中添加一个新类,它将实现 ICommand 接口。下面是ICommand接口的实现。
using System;
using System.Windows.Input;

namespace MVVMHierarchiesDemo {

   public class MyICommand<T> : ICommand {

      Action<T> _TargetExecuteMethod;
      Func<T, bool> _TargetCanExecuteMethod;

      public MyICommand(Action<T> executeMethod) {
         _TargetExecuteMethod = executeMethod;
      }

      public MyICommand(Action<T> executeMethod, Func<T, bool> canExecuteMethod) {
         _TargetExecuteMethod = executeMethod;
         _TargetCanExecuteMethod = canExecuteMethod;
      }

      public void RaiseCanExecuteChanged() {
         CanExecuteChanged(this, EventArgs.Empty);
      }

      #region ICommand Members

      bool ICommand.CanExecute(object parameter) {

         if (_TargetCanExecuteMethod != null) {
            T tparm = (T)parameter;
            return _TargetCanExecuteMethod(tparm);
         }

         if (_TargetExecuteMethod != null) {
            return true;
         }

         return false;
      }

      // Beware - should use weak references if command instance lifetime is
         longer than lifetime of UI objects that get hooked up to command

      // Prism commands solve this in their implementation

      public event EventHandler CanExecuteChanged = delegate { };

      void ICommand.Execute(object parameter) {
         if (_TargetExecuteMethod != null) {
            _TargetExecuteMethod((T)parameter);
         }
      }

      #endregion
   }
}
我们现在需要为这些视图模型设置一些顶级导航,并且该切换的逻辑应该属于 MainWindowViewModel 内部。为此,我们将使用一个在 navigation 上调用的方法,它接受一个字符串目的地并返回 CurrentViewModel 属性。
private void OnNav(string destination) {

   switch (destination) {
      case "orders":
         CurrentViewModel = orderViewModelModel;
      break;
      case "customers":
      default:
         CurrentViewModel = custListViewModel;
      break;
   }
}
为了导航这些不同的视图,我们需要在 MainWindow.xaml 文件中添加两个按钮。以下是完整的 XAML 文件实现。
<Window x:Class = "MVVMHierarchiesDemo.MainWindow"
   xmlns = "http://schemas.microsoft.com/winfx/2006/xaml/presentation"
   xmlns:x = "http://schemas.microsoft.com/winfx/2006/xaml"
   xmlns:d = "http://schemas.microsoft.com/expression/blend/2008"
   xmlns:mc = "http://schemas.openxmlformats.org/markup-compatibility/2006"
   xmlns:local = "clr-namespace:MVVMHierarchiesDemo"
   xmlns:views = "clr-namespace:MVVMHierarchiesDemo.Views"
   xmlns:viewModels = "clr-namespace:MVVMHierarchiesDemo.ViewModel"
   mc:Ignorable = "d"
   Title = "MainWindow" Height = "350" Width = "525">

   <Window.DataContext>
      <local:MainWindowViewModel/>
   </Window.DataContext>

   <Window.Resources>
      <DataTemplate DataType = "{x:Type viewModels:CustomerListViewModel}">
         <views:CustomerListView/>
      </DataTemplate>

      <DataTemplate DataType = "{x:Type viewModels:OrderViewModel}">
         <views:OrderView/>
      </DataTemplate>
   </Window.Resources>

   <Grid>
      <Grid.RowDefinitions>
         <RowDefinition Height = "Auto" />
         <RowDefinition Height = "*" />
      </Grid.RowDefinitions>

      <Grid x:Name = "NavBar">
         <Grid.ColumnDefinitions>
            <ColumnDefinition Width = "*" />
            <ColumnDefinition Width = "*" />
            <ColumnDefinition Width = "*" />
         </Grid.ColumnDefinitions>

         <Button Content = "Customers"
            Command = "{Binding NavCommand}"
            CommandParameter = "customers"
            Grid.Column = "0" />

         <Button Content = "Order"
            Command = "{Binding NavCommand}"
            CommandParameter = "orders"
            Grid.Column = "2" />
      </Grid>

      <Grid x:Name = "MainContent" Grid.Row = "1">
         <ContentControl Content = "{Binding CurrentViewModel}" />
      </Grid>

   </Grid>

</Window>
以下是完整的 MainWindowViewModel 实现。
using MVVMHierarchiesDemo.ViewModel;
using MVVMHierarchiesDemo.Views;

using System;
using System.Collections.Generic;
using System.Linq;
using System.Text;
using System.Threading.Tasks;

namespace MVVMHierarchiesDemo {

   class MainWindowViewModel : BindableBase {

      public MainWindowViewModel() {
         NavCommand = new MyICommand<string>(OnNav);
      }

      private CustomerListViewModel custListViewModel = new CustomerListViewModel();

      private OrderViewModel orderViewModelModel = new OrderViewModel();

      private BindableBase _CurrentViewModel;

      public BindableBase CurrentViewModel {
         get {return _CurrentViewModel;}
         set {SetProperty(ref _CurrentViewModel, value);}
      }

      public MyICommand<string> NavCommand { get; private set; }

      private void OnNav(string destination) {

         switch (destination) {
            case "orders":
               CurrentViewModel = orderViewModelModel;
               break;
            case "customers":
            default:
               CurrentViewModel = custListViewModel;
               break;
         }
      }
   }
}
从 BindableBase 类派生所有的 ViewModel。当上面的代码编译执行后,你会看到下面的输出。
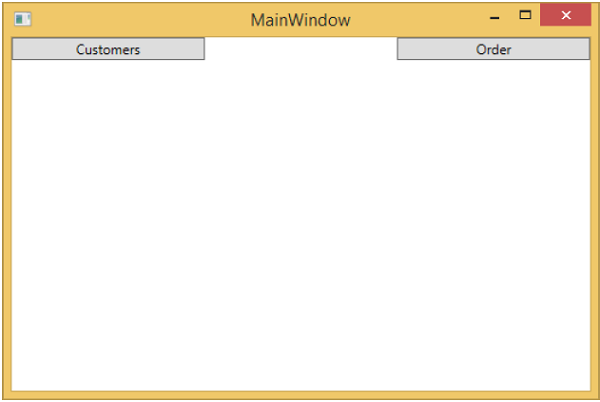
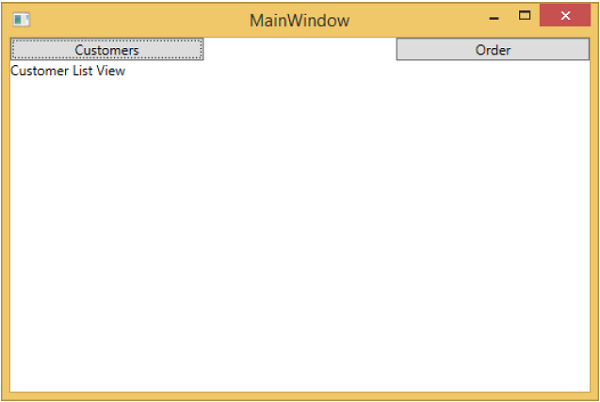
如您所见,我们在 MainWindow 上仅添加了两个按钮和一个 CurrentViewModel。如果您单击任何按钮,它将导航到该特定视图。让我们单击“客户”按钮,您将看到显示 CustomerListView。
我们建议您逐步执行上述示例,以便更好地理解。
