WPF – 路由事件
WPF – 路由事件
甲路由事件是事件的类型,可以调用上多个侦听处理程序中的一个元素树,而不是仅仅对引发事件的对象。它基本上是一个由路由事件类的实例支持的 CLR 事件。它在 WPF 事件系统中注册。RoutedEvents 具有三种主要的路由策略,如下所示 –
- 直接事件
- 冒泡事件
- 隧道事件
直接事件
直接事件类似于 Windows 窗体中的事件,这些事件由发起事件的元素引发。
与标准 CLR 事件不同,直接路由事件支持类处理,它们可以在自定义控件样式内的事件设置器和事件触发器中使用。
直接事件的一个很好的例子是 MouseEnter 事件。
冒泡事件
冒泡事件从事件发生的元素开始。然后它沿着可视化树向上移动到可视化树中的最顶层元素。因此,在 WPF 中,最顶层的元素很可能是一个窗口。
隧道事件
元素树根上的事件处理程序被调用,然后事件沿着可视化树向下传播到所有子节点,直到到达事件发生的元素。
冒泡事件和隧道事件之间的区别在于隧道事件总是以预览开始。
在 WPF 应用程序中,事件通常作为隧道/冒泡对实现。因此,您将有一个预览 MouseDown 和一个 MouseDown 事件。
下面给出了一个简单的路由事件示例,其中使用一些属性和事件创建了一个按钮和三个文本块。
<Window x:Class = "WPFRoutedEvents.MainWindow"
   xmlns = "http://schemas.microsoft.com/winfx/2006/xaml/presentation"
   xmlns:x = "http://schemas.microsoft.com/winfx/2006/xaml"
   Title = "MainWindow" Height = "450" Width = "604" ButtonBase.Click  = "Window_Click" >

   <Grid>
      <StackPanel Margin = "20" ButtonBase.Click = "StackPanel_Click">

         <StackPanel Margin = "10">
            <TextBlock Name = "txt1" FontSize = "18" Margin = "5" Text = "This is a TextBlock 1" />
            <TextBlock Name = "txt2" FontSize = "18" Margin = "5" Text = "This is a TextBlock 2" />
            <TextBlock Name = "txt3" FontSize = "18" Margin = "5" Text = "This is a TextBlock 3" />
         </StackPanel>

         <Button Margin = "10" Content = "Click me" Click = "Button_Click" Width = "80"/>
      </StackPanel>
   </Grid>

</Window>
这是 Button、StackPanel 和 Window 的 Click 事件实现的 C# 代码。
using System.Windows;

namespace WPFRoutedEvents {
   /// <summary>
      /// Interaction logic for MainWindow.xaml
   /// </summary>

   public partial class MainWindow : Window {

      public MainWindow() {
         InitializeComponent();
      }

      private void Button_Click(object sender, RoutedEventArgs e) {
         txt1.Text = "Button is Clicked";
      }

      private void StackPanel_Click(object sender, RoutedEventArgs e) {
         txt2.Text = "Click event is bubbled to Stack Panel";
      }

      private void Window_Click(object sender, RoutedEventArgs e) {
         txt3.Text = "Click event is bubbled to Window";
      }

   }
}
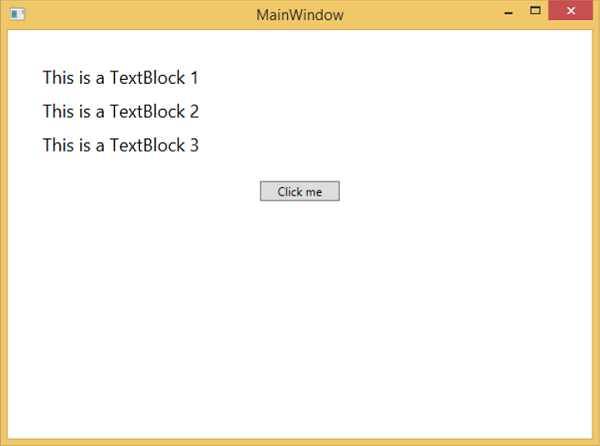
当您编译并执行上述代码时,它将产生以下窗口 –
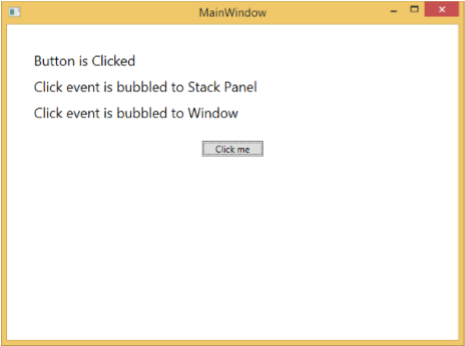
当您单击按钮时,文本块将更新,如下所示。
如果要在任何特定级别停止路由事件,则需要设置 e.Handled = true;
让我们更改StackPanel_Click事件,如下所示 –
private void StackPanel_Click(object sender, RoutedEventArgs e) {
   txt2.Text = "Click event is bubbled to Stack Panel";
   e.Handled = true;
}
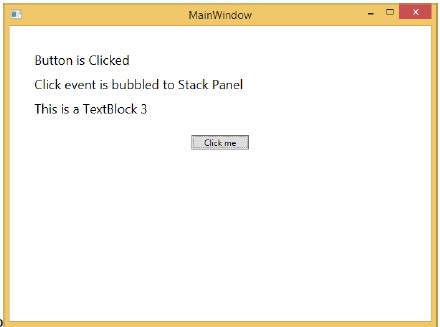
当您单击按钮时,您会观察到单击事件不会被路由到窗口,而是会停在堆栈面板和 3rd 文本块不会更新。
自定义路由事件
在 .NET 框架中,也可以定义自定义路由事件。您需要按照下面给出的步骤在 C# 中定义自定义路由事件。
-
使用系统调用 RegisterRoutedEvent 声明并注册您的路由事件。
-
指定路由策略,即 Bubble、Tunnel 或 Direct。
-
提供事件处理程序。
让我们举个例子来了解更多关于自定义路由事件的信息。按照下面给出的步骤 –
-
使用 WPFCustomRoutedEvent 创建一个新的 WPF 项目
-
右键单击您的解决方案,然后选择添加 > 新建项目…
-
将打开以下对话框,现在选择自定义控件 (WPF)并将其命名为MyCustomControl。

-
单击添加按钮,您将看到两个新文件(Themes/Generic.xaml 和 MyCustomControl.cs)将添加到您的解决方案中。
以下 XAML 代码为 Generic.xaml 文件中的自定义控件设置样式。
<ResourceDictionary
   xmlns = "http://schemas.microsoft.com/winfx/2006/xaml/presentation"
   xmlns:x = "http://schemas.microsoft.com/winfx/2006/xaml"
   xmlns:local = "clr-namespace:WPFCustomRoutedEvent">

   <Style TargetType = "{x:Type local:MyCustomControl}">
      <Setter Property = "Margin" Value = "50"/>
      <Setter Property = "Template">
         <Setter.Value>
            <ControlTemplate TargetType = "{x:Type local:MyCustomControl}">

               <Border Background = "{TemplateBinding Background}"
                  BorderBrush = "{TemplateBinding BorderBrush}"
                  BorderThickness = "{TemplateBinding BorderThickness}">
                  <Button x:Name = "PART_Button" Content = "Click Me" />
               </Border>

            </ControlTemplate>
         </Setter.Value>
      </Setter>
   </Style>

</ResourceDictionary>
下面给出的是MyCustomControl 类的 C# 代码,该类继承自Control 类,其中为自定义控件创建了自定义路由事件 Click。
using System.Windows;
using System.Windows.Controls;

namespace WPFCustomRoutedEvent {

   public class MyCustomControl : Control {

      static MyCustomControl() {
         DefaultStyleKeyProperty.OverrideMetadata(typeof(MyCustomControl),
            new FrameworkPropertyMetadata(typeof(MyCustomControl)));
      }

      public override void OnApplyTemplate() {
         base.OnApplyTemplate();

         //demo purpose only, check for previous instances and remove the handler first
         var button  =  GetTemplateChild("PART_Button") as Button;
         if (button ! =  null)
         button.Click + =  Button_Click;
      }

      void Button_Click(object sender, RoutedEventArgs e) {
         RaiseClickEvent();
      }

      public static readonly RoutedEvent ClickEvent  =
         EventManager.RegisterRoutedEvent("Click", RoutingStrategy.Bubble,
         typeof(RoutedEventHandler), typeof(MyCustomControl));

      public event RoutedEventHandler Click {
         add { AddHandler(ClickEvent, value); }
         remove { RemoveHandler(ClickEvent, value); }
      }

      protected virtual void RaiseClickEvent() {
         RoutedEventArgs args = new RoutedEventArgs(MyCustomControl.ClickEvent);
         RaiseEvent(args);
      }

   }
}
这是 C# 中的自定义路由事件实现,当用户单击它时将显示一个消息框。
using System.Windows;

namespace WPFCustomRoutedEvent {
   // <summary>
      // Interaction logic for MainWindow.xaml
   // </summary>

   public partial class MainWindow : Window {

      public MainWindow() {
         InitializeComponent();
      }

      private void MyCustomControl_Click(object sender, RoutedEventArgs e) {
         MessageBox.Show("It is the custom routed event of your custom control");
      }

   }
}
这是 MainWindow.xaml 中的实现,用于添加带有路由事件 Click 的自定义控件。
<Window x:Class = "WPFCustomRoutedEvent.MainWindow"
   xmlns = "http://schemas.microsoft.com/winfx/2006/xaml/presentation"
   xmlns:x = "http://schemas.microsoft.com/winfx/2006/xaml"
   xmlns:local = "clr-namespace:WPFCustomRoutedEvent"
   Title = "MainWindow" Height = "350" Width = "604">

   <Grid>
      <local:MyCustomControl Click = "MyCustomControl_Click" />
   </Grid>

</Window>
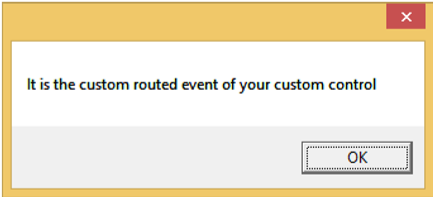
当上面的代码被编译和执行时,它会产生下面的窗口,其中包含一个自定义控件。

当您单击自定义控件时,它将产生以下消息。